
trellis ideas
By Anna Grace | 29 March 2026
Trellis Ideas That Actually Earn Their Keep in Your Garden
My tomato vines staged a full mutiny last summer. They flopped over the fence, strangled my pepper plants, and generally acted like they owned the place. That’s the exact moment I got serious about trellises, and honestly? I wish I’d started years earlier.
A good trellis isn’t just a stick with string wrapped around it. It’s the difference between a garden that looks intentional and one that looks like it’s actively trying to escape. Whether you’re growing cucumbers, climbing roses, or a jungle of morning glories, the right trellis idea saves space, improves airflow, and makes harvesting way less of a wrestling match. Below are trellis ideas that range from five-minute DIY fixes to statement pieces that double as garden decor.
Classic A-Frame Trellises for Vining Vegetables
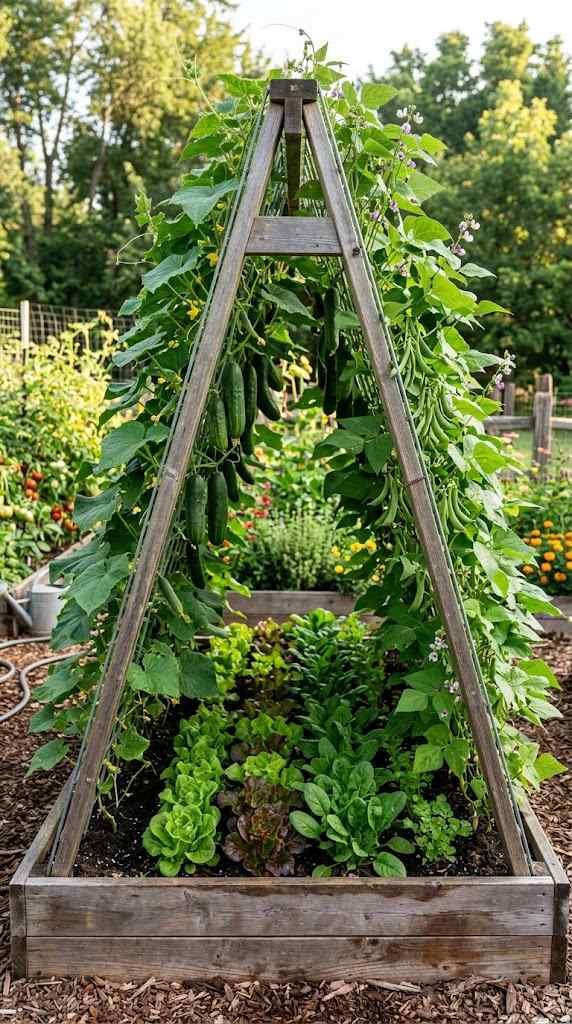
If you grow cucumbers, pole beans, or squash, an A-frame trellis is probably your best friend and you don’t even know it yet. Two panels of lattice or cattle fencing lean against each other like a tent, forming a peaked structure that’s shockingly sturdy once secured at the top.
Why it works: the angled sides give vines more surface area to grip, and the open middle creates a shady tunnel underneath great for lettuce or spinach that hates direct summer sun. Squash and cucumbers hanging down through the frame also stay cleaner and rot less, since they’re not sitting on damp soil.
Sizing matters more than people think. A trellis under 5 feet tall will get outgrown by mid-July if you’re growing indeterminate cucumbers or pole beans both can easily climb 8 to 10 feet in a single season. Go tall from the start rather than adding extensions later, which never look as sturdy as the original build.
A few build notes worth knowing:
- Use cattle panels for heavy crops like squash; they won’t sag under the weight.
- Lattice or bamboo works fine for lighter climbers like peas or beans.
- Anchor the base with stakes driven into the ground wind loves to topple these things.
- Leave at least 3 feet of clearance underneath if you’re planning to walk or plant beneath it.
- Space the two panels roughly 3-4 feet apart at the base for a stable peak angle.
I built mine out of leftover cattle panel and zip ties in about 40 minutes, and it’s outlasted three seasons without a single wobble. Cheap, ugly-but-charming, and it just works. One thing I’d change: I’d add a horizontal support bar across the peak next time, since heavy squash vines eventually pull the two panels apart at the top if nothing’s holding them together.
Maintenance-wise, an A-frame needs almost nothing beyond an annual check for rust (if metal) or rot at the base (if wood). Hose off dirt and plant debris at the end of the season so mold doesn’t set in over winter.
Companion planting works especially well with an A-frame setup. Plant something shallow-rooted like radishes or lettuce along the base of each panel, and you’re using the same footprint twice climbers going up, quick crops filling in below before the vines shade them out completely. It’s the closest thing to a garden cheat code I’ve found. Just don’t crowd the base too tightly, since you’ll still need room to reach in for harvesting once the vines fill out.
Watering an A-frame setup also differs slightly from a flat bed. Because the vines grow densely along both angled panels, water can run off the leaves before it reaches the soil underneath. A soaker hose laid along the base of each panel solves this far better than overhead watering, and it keeps foliage dry, which cuts down on fungal issues like powdery mildew.
Freestanding Obelisks for Flowering Climbers
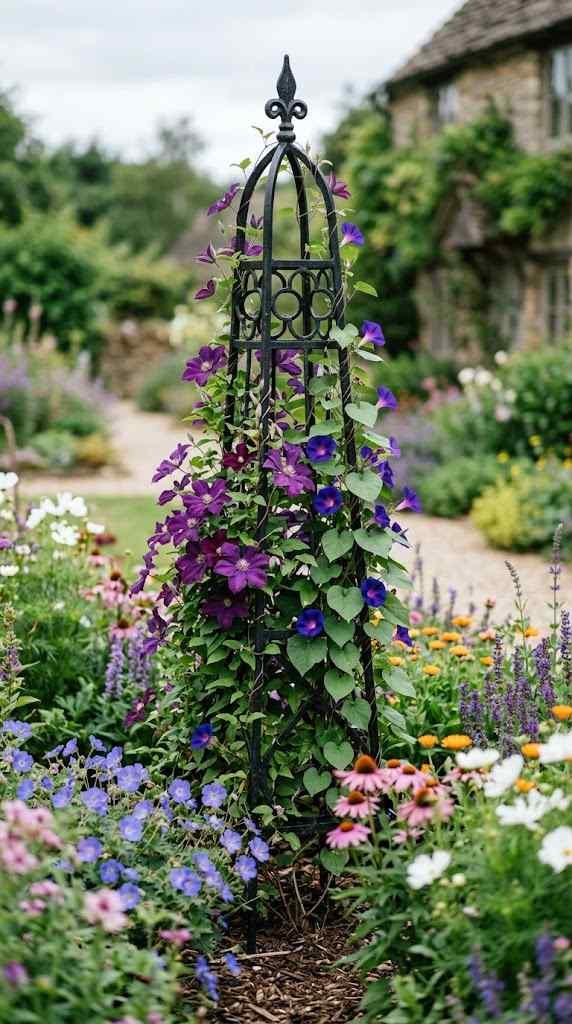
Obelisks are the trellis world’s answer to wanting function and a little drama in the same structure. These tall, tapered structures usually four-sided, sometimes spiral stand upright on their own and give climbing plants like clematis, morning glories, and sweet peas something elegant to wrap around.
Unlike flat trellises that need a wall or fence for support, obelisks work as focal points in the middle of a flower bed. Plant one in a large container on a patio, and suddenly your climbing jasmine has somewhere classy to go instead of sprawling across your outdoor furniture.
Materials matter here, and this is where a lot of people overspend or underspend without realizing it:
| Material | Lifespan | Best For | Rough Cost |
|---|---|---|---|
| Powder-coated steel | 20+ years | Permanent flower beds | $$$ |
| Wrought iron | 15-25 years | Statement pieces, patios | $$$$ |
| Cedar | 8-10 years | Cottage gardens | $$ |
| Untreated pine | 3-5 years | Budget or temporary use | $ |
Pick metal if you want a lifetime piece; pick wood if you like the aesthetic and don’t mind replacing it every 8-10 years. Is a wooden obelisk more romantic-looking? Sure. Is it also going to need re-staining and eventual replacement? Also sure. Know what you’re signing up for before you fall in love with the look on Pinterest.
Height and footprint deserve a second thought too. A 6-foot obelisk in a small bed can dwarf everything around it, while a 3-foot one gets swallowed by an aggressive climber like morning glory within weeks. Match the obelisk height to the mature size of whatever you’re planting, and give it a footprint of at least 18 inches so the base doesn’t tip once the vine puts on weight.
For planting, sink the legs 6-8 inches into the soil and, if it’s freestanding in a bed rather than a pot, consider a bag of quick-set concrete around the base if your region gets strong winds. Nothing ruins an afternoon like finding your obelisk face-down in the mulch after a storm.
Placement inside a mixed border deserves some thought too. An obelisk works best set slightly behind shorter perennials rather than dead center in a bed, so the climbing vine has a backdrop of foliage rather than standing alone against bare soil. I made the mistake of centering mine in a new bed once, and it looked like a flagpole for two full months before anything filled in around it.
Pruning also matters more with obelisks than people expect. Left alone, clematis and morning glory will happily climb straight to the top and then just flop over the peak, creating a top-heavy mess instead of even coverage. Pinching new growth back every few weeks early in the season encourages the vine to branch out sideways, which fills the whole structure instead of just the tip.
Wall-Mounted Trellises for Small-Space Gardens
Not everyone has a sprawling backyard, and that’s fine vertical gardening exists precisely because of people like us. A wall-mounted trellis turns a bare fence, brick wall, or even a balcony railing into legitimate growing space. This is arguably the smartest trellis idea for apartment dwellers or anyone with a tiny patio.
Options here are genuinely broad:
- Expandable wood lattice panels that fold out like an accordion, perfect for temporary or rented spaces.
- Wire grid panels (sometimes sold as “garden walls”) that hold small pots or let vines like ivy and pothos climb directly.
- Espalier-style horizontal wire runs, ideal for training fruit trees flat against a sunny wall a technique that dates back centuries in European kitchen gardens.
- Modular cube trellises, which snap together and can be reconfigured as your plants grow, great for renters who move often.
One thing people forget: leave a gap of at least 2-3 inches between the trellis and the wall. Plants need airflow back there, and pressing vines directly against brick or siding traps moisture, which invites mold and pests. A handful of standoff brackets solves this instantly, and they’re cheap enough that there’s no excuse to skip this step.
Sun exposure changes everything on a wall-mounted setup. South-facing walls in warmer climates can actually get too hot for delicate climbers, since the wall radiates heat back at the plant all afternoon. If that’s your situation, stick to heat-tolerant options like black-eyed Susan vine or certain jasmine varieties rather than anything that prefers cooler, indirect light.
FYI, if you’re renting, look for trellises that attach with tension mounts or heavy-duty command strips rather than screws. Your landlord will thank you, and so will your deposit. Tension-mounted trellises that wedge between floor and ceiling are especially useful on balconies where drilling isn’t an option at all.
Watering is worth planning for too. Vertical setups dry out faster than ground-level beds because of increased air exposure, so a small drip irrigation kit or even a self-watering planter at the base saves you from daily hose duty in peak summer.
Weight capacity is worth checking before you mount anything permanent. A small wire grid holding lightweight annuals is one thing, but a trellis meant to support a mature wisteria or a heavy-fruiting grape needs actual masonry anchors, not just drywall screws. Wisteria in particular gets shockingly heavy once established, and I’ve seen more than one trellis pulled clean off a fence because nobody accounted for that.
Brick and stucco walls need different hardware than wood siding, so it’s worth matching the anchor to the surface rather than grabbing whatever’s in the junk drawer. Masonry screws or expansion anchors hold far better in brick, while wood siding takes standard screws just fine as long as you’re hitting a stud or furring strip behind it.
Repurposed and Budget-Friendly Trellis Hacks
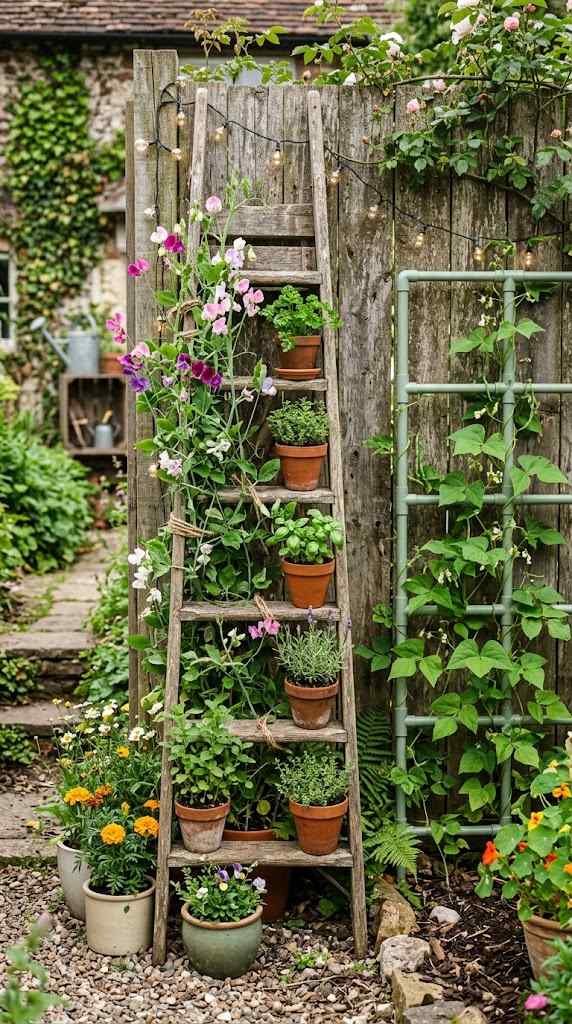
You don’t need a garden center trip to build something functional. Some of the best trellis ideas come from stuff already sitting in your garage or headed to the curb.
Old ladders make fantastic trellises lean one against a wall and let climbing plants use each rung as a foothold. Bed frames (the metal kind with a headboard) work beautifully for training roses or clematis; just sink the legs into the ground like fence posts. Even discarded wine barrel rings, welded or wired together, create a rustic circular support for smaller vines.
| Repurposed Item | Best For | Effort Level |
|---|---|---|
| Old wooden ladder | Climbing herbs, light vines | Low |
| Metal bed frame | Roses, clematis | Medium |
| Wine barrel rings | Small vines, decorative | Medium |
| PVC pipe grid | Cucumbers, beans | Low |
| Bamboo poles + twine | Peas, sweet peas | Very low |
| Wooden pallets | Strawberries, small vegetables | Low |
The PVC pipe grid is probably the fastest weekend project on this list. Grab some 1/2-inch PVC, cut it into equal lengths, and glue it into a simple grid using T-joints and elbow connectors. Paint it if you want it to look less like plumbing and more like garden art. Total cost: usually under $20, depending on how big you go.
Pallet trellises deserve a mention too, since they’ve become a staple of small-space gardening. Stand a pallet upright, staple landscape fabric across the back, and fill the slats with soil strawberries and shallow-rooted herbs thrive in the pockets this creates. It’s not technically a “climbing” trellis in the traditional sense, but it solves the same core problem: getting plants to grow up instead of out.
I’ll admit the bed-frame trellis sounded gimmicky to me until I actually saw one covered in climbing roses. It looks straight out of a cottagecore Pinterest board, and it costs nothing if you already have an old frame lying around. The one caution here is rust an untreated metal frame left outdoors for years can leave orange streaks on nearby siding or pavers, so a coat of rust-inhibiting spray paint is worth the extra hour.
Weatherproofing repurposed materials is the step most people skip, and it’s the reason DIY trellises sometimes fall apart after a single season. A cheap coat of exterior polyurethane on wood, or rust-inhibiting primer on metal, adds years to a structure that cost you nothing but scrap materials and a weekend afternoon. Skipping this step doesn’t ruin the project immediately, but by year two you’ll notice splintering wood or flaking rust that could’ve been avoided.
Mixing materials also opens up more creative options than sticking to one repurposed item. A ladder trellis paired with wire strung between the rungs handles both sturdy climbers and delicate ones on the same structure, which is something a single-material trellis usually can’t pull off as cleanly.
Edible Living Walls and Fruit Tree Trellises
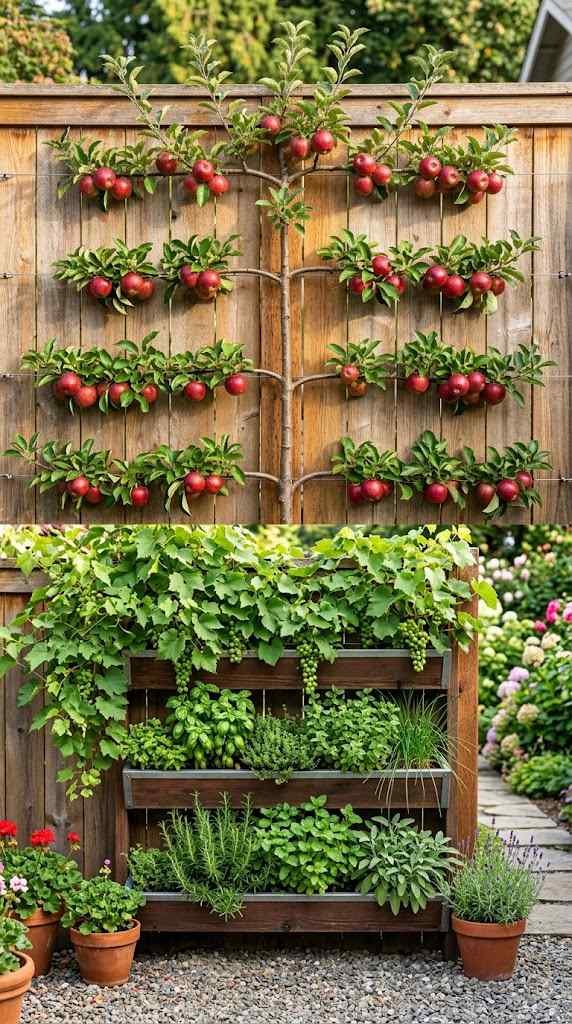
This one’s less “trellis” and more “trellis philosophy,” but it deserves its own section because it changes how you think about vertical space entirely. Instead of treating a trellis as a support for one crop, you build a whole vertical ecosystem beans on one section, cucumbers on another, maybe a fruiting vine like kiwi or grape trained along the top.
Grapevines especially reward patience here. A sturdy overhead pergola-style trellis, built with pressure-treated 4×4 posts and horizontal wire runs, can support a mature grapevine for 20+ years, creating natural summer shade below while producing actual fruit. That’s a two-for-one most trellis types can’t match. Just budget for the wait: grapevines typically need two to three years before they produce a meaningful harvest.
Fruit tree espalier deserves a mention too. Training an apple or pear tree flat against a trellis or wall isn’t just space-efficient it also increases sun exposure to more of the fruit, which can mean better flavor and color. It takes a few seasons of careful pruning to establish the shape, so this isn’t an instant-gratification project. But if you’ve got a narrow side yard doing nothing, why not turn it into a productive strip of trained fruit trees?
For anyone building a living wall from scratch, layering matters. Put taller, sun-loving climbers like beans or grapes at the top tier, medium vines like cucumbers in the middle, and shade-tolerant crops like lettuce or herbs at the base where the upper foliage blocks direct sun. This mimics how a natural forest edge layers itself and keeps every section of the trellis productive instead of just the top third.
Watch spacing between different crops sharing one structure. Beans and cucumbers planted too close together will tangle into a single unmanageable mass by August, making harvest nearly impossible without damaging one crop to reach the other. Give each species its own dedicated section of trellis, even if that means a slightly less “wild and abundant” look early in the season.
Rotating crops through a living wall each season also keeps the soil healthier and prevents the same pests and diseases from settling in year after year. If beans occupied the top tier this year, move them to the middle tier next season and let something else, like peas, take that top spot instead. It sounds like overkill for a trellis, but the payoff shows up in fewer disease issues by year three.
Harvesting from a multi-crop trellis also takes a bit of strategy. Pick from the top down rather than reaching through lower foliage, since disturbing the bottom tiers first tends to knock ripe produce loose before you get to it. A small step stool earns its keep here trust me, I learned that one the hard way after losing half a grape cluster to gravity.
FAQ’s
What’s the cheapest trellis idea for a vegetable garden?
A PVC pipe grid or repurposed bamboo poles with twine cost under $20 and work great for beans, peas, and cucumbers.
How far should a trellis be from a wall?
Leave 2-3 inches of gap using standoff brackets to prevent moisture buildup, mold, and pest problems behind vines.
Can I use an old ladder as a trellis?
Yes, lean a ladder against a wall or fence and let climbing plants use each rung as a natural foothold.
What trellis works best for small balconies or apartments?
Wall-mounted wire grids or expandable lattice panels with tension mounts give apartment gardens vertical space without damaging walls.
Do metal or wood trellises last longer?
Metal, especially powder-coated steel, lasts decades with little upkeep; wood looks charming but needs restaining and eventual replacement.
CONCLUSION
The best trellis idea isn’t the fanciest one it’s the one that matches what you’re actually growing and how much space you’ve got to work with. A tiny balcony calls for a wall-mounted grid, not a 6-foot obelisk. A vegetable bed full of cucumbers wants an A-frame, not delicate lattice that’ll buckle under the weight.
Start with your plant’s growth habit, match the trellis material to your climate (metal for humid areas, treated wood for dry ones), and don’t be afraid to repurpose junk you already own. My cattle-panel A-frame taught me that the ugliest, cheapest option is sometimes the one that performs best for years. Pick something sturdy, give your plants room to climb, and let the garden do what it actually wants to do grow up, not out.